Showing posts with label glitter. Show all posts
2.18.2014
embossing fun
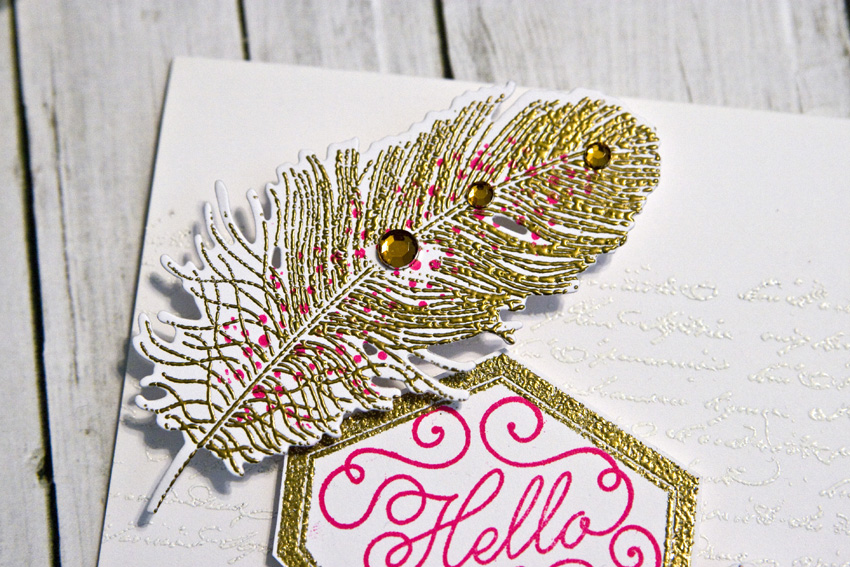
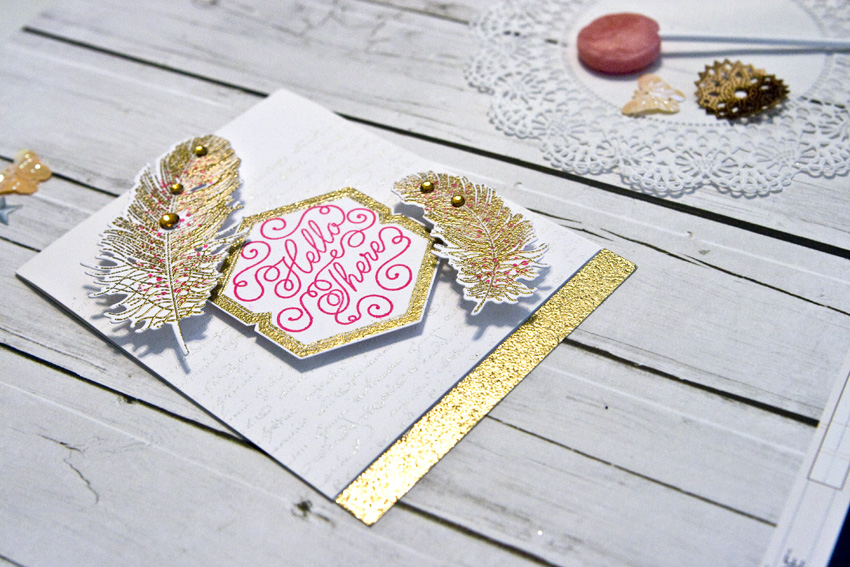
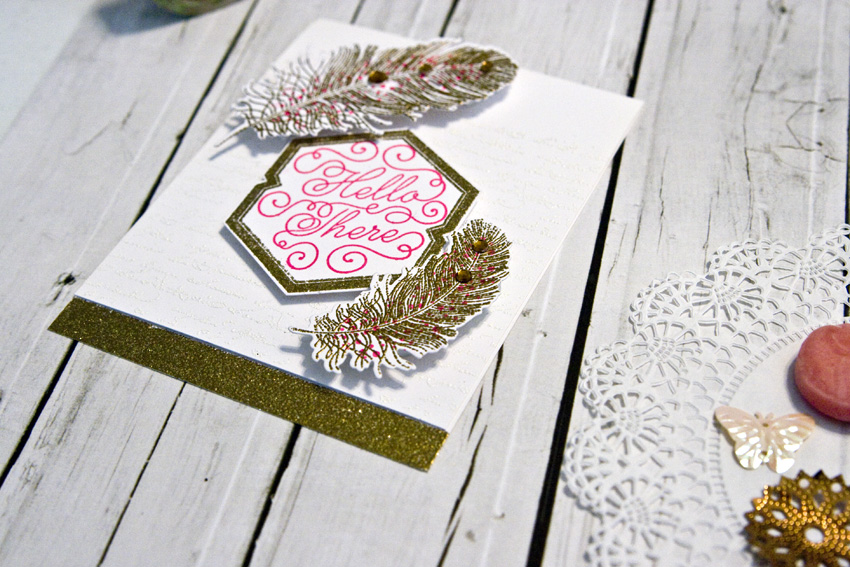
i recently saw a challenge somewhere to make a card with embossing. now both heat and dry embossing are nothing new to me. but i wanted to take that challenge and see how much heat embossing i could do on one card.
turns out i had just received a lovely box of stamps from papertrey ink that i had ordered and thought those would be perfect to use on a card. i ended up LOVING this card so much with the white, gold and neon pink. also i cut off about a 1/2" off the bottom of the front flap of the card, used a little post-it note tape to block off the rest of the inside of the card and just used my versamark ink pad directly on the end of the card then used the gold glitter embossing powder for that edge.
products used:
papertrey ink scrolling stamp
papertrey ink feather finery stamp and die
stampabilities wood mounted stamp - faded text background
american crafts embossing powder zing - gold metallic, gold glitter, white
versamark ink
hero arts ink - neon pink
jewels - unknown
- jess
ps. sorry if you post a comment w/ a question as my blog template is messed up and i can't directly reply to your comments :-( and i can't figure out how to fix it...
8.27.2013
card creating update
it's been over a month since i shared any new greeting cards with you guys! i actually haven't created any in a while, but i realized that i hadn't shared these most recent cards here on the blog.
7.10.2013
studio calico sunday sketch
this is the second challenge i participated in this week. it was for the sunday sketch at studio calico.
for some reason i had a very difficult time with this card. the first card front i ended up having to throw in the trash because i knocked it over while it was drying and smeared it all. this one isn't perfect, but i'm okay with that. i added the splatters to make the imperfections of the glittered areas look not so noticeable ;-)
- jess
for some reason i had a very difficult time with this card. the first card front i ended up having to throw in the trash because i knocked it over while it was drying and smeared it all. this one isn't perfect, but i'm okay with that. i added the splatters to make the imperfections of the glittered areas look not so noticeable ;-)
- jess
7.09.2013
card challenge
i've been in a bit of a crafting rut lately. i've had lots of ideas for projects and during the day i can't wait to get home and jump right into them. but then when i get home i loose all that momentum.
so i decided to push past that this weekend and worked on a couple of challenges that i found online. i found this one from stamp away with me. while i couldn't officially participate in their challenge since i didn't have any wplus9 product, that didn't keep me from using this challenge as a jumping board for some creativity.
this is the card that i came up with and it was actually perfect timing as i needed a card for my niece's first birthday!
- jess
so i decided to push past that this weekend and worked on a couple of challenges that i found online. i found this one from stamp away with me. while i couldn't officially participate in their challenge since i didn't have any wplus9 product, that didn't keep me from using this challenge as a jumping board for some creativity.
this is the card that i came up with and it was actually perfect timing as i needed a card for my niece's first birthday!
- jess
2.13.2013
diy: repurposed candle holder
today i have a little crafty project to share with you. you may even of seen this before...it's nothing new really. i just thought i'd share my version.
i am a little bit obsessed lately w/ the bath & body works candles. twice at the end of last year when they were having their 2 for $20 sale i stocked up. if you could look in my closet you'd see them nestled on a little shelf between shoes ;-)
so what do you do with the left over glass once you've burned the candle?
do you throw it away? maybe just wash it out and stick it in a corner and throw all your hair bands and clips into it?
i decided i wanted to to make mine a beautiful and functional piece for my room. i'd recently seen this video my missglamorazzi on youtube and thought what a fun way to transform this used candle!
i first decided that i was going to use this first try to replace my poor pen/pencil/marker/misc holder that i use for scrapbooking. as you can see it definitely was no longer getting the job done!..ha!
i didn't really like the idea of freezing the candle as missglamorazzi had done in her videos. so i went to my mom for advice as i knew she had removed all the leftover wax out of some of her candles. she went right to it with mine as well! no need to freeze...she just took a butter knife and removed all the wax pretty easily along with the metal circles that had held the candle wicks. next we easily removed the labels. then we placed the candle holder in the dishwasher and once it came out it was good to go!
i have quite a few martha stewart glitters and since i'm still loving rose gold i decided to go with the copper glitter. i also already had this matte glue/sealer on hand along w/ the foam brush from some other projects. so i dipped the brush in the glue/sealer and then simply coated the inside of the glass in one even coat.
next i poured in some of the glitter then began to swirl the glass around to move the glitter so it would be evenly coated all on the inside. i also have this little tray used to catch glitter so i made sure that i held the glass over the tray as i swirled the glitter around. it took a bit more than i thought and so i did actually put glitter in about 3 times to get it all coated. oh, you do want to move pretty quick as you don't want the glue to dry before you can get the glitter to adhere.
after i made sure all the glue/sealer was covered with the glitter i emptied out the unused glitter out of the glass and onto the tray. then used the tray to transfer the glitter back into the bottle. as you can tell, from the outside the glass still appears streaky, but the glue dries totally clear so it looks even once dry.
i then sat it aside for a few hours to make sure it was completely dry. i wanted some glass beads to use as filler for the jar, but was too impatient and this decorative chunky sand was the only thing i could find at my local walmart that would work. surprisingly it only took 1/2 the bag to fill the jar 2/3 full.
all that was left to do was transfer all my markers/pens/etc into their new home! i'm really loving it so far and can't wait until i burn through some more candles!
- jess
thanks for stopping by!!!
my story
- jessica - craftychicgirl
- child of God // daughter, grand-daughter, aunt, niece // lover of most anything Jane Austen related or period-piece // dark chocolate addict // collector of shoes, clothes and accessories // art director // painter // paper crafter //